Building custom image for Raspberry Pi 4 using Buildroot | RPi4 | bash | nginx | openSSH | nmap
Introduction to Buildroot
Buildroot is a popular tool for building embedded Linux systems. It simplifies the process of creating custom Linux images for embedded devices by automating the build process and managing dependencies. To learn more about Buildroot and its capabilities, refer to the Buildroot manual and clone the Buildroot source files from the Buildroot GitHub repository.
What we are going to do is, we will first build a default image for the Raspberry Pi 4 using Buildroot along with the OpenSSH package. Then, we will inspect the image after booting it up. Later, we will rebuild the image with additional packages like bash, nginx, and nmap.
Generating the .config file for Raspberry Pi 4
The Buildroot tool already has default configurations for widely used platforms. So, we will start off by listing the default configurations available for the Raspberry Pi boards.
make list-defconfigs | grep raspberrypiNow, we have to generate the .config file for our Raspberry Pi 4, using
make raspberrypi4_64_defconfigCustomizing the .config file
Now, we have the .config file for our Raspberry Pi 4's default image. We could execute the make command and build the image right away, but let's see more. The following command will open up the Buildroot setup screen.
make menuconfig
Here, I have changed the System Hostname to mbedsystRPi, the System Banner to 'Welcome to mbedsystRPi' and finally set the Root password to mbedsyst.
Adding Target specific packages
Now, we have to add target-specific packages. At this stage, we are only adding an SSH Service, openSSH, to access the Raspberry Pi from our Host device using a service like PuTTY. Later, we will add the rest of the packages.
With this, we have updated the .config file that we built earlier. Now the config file contains rules to build the openSSH package for the Raspberry Pi image.
Building the custom image
It's time to build the image. It is basically executing the make utility. This is going to take some time, a little over an hour.
make
After the image has been built, you can inspect the /buildroot/output/images directory to check if there is a file under the name, sdcard.img.
Now, you can flash the SD Card using a tool like the BalenaEtcher. Check out how to Install BalenaEtcher on your device.
Generating the build graphs
Buildroot allows us to generate graphs to depict dependencies for the whole image or for specific packages, the build duration of each package, and the filesystem size contribution of each package.
make graph-depends
make graph-build
make graph-size
You can find the build graphs in the /buildroot/output/graphs/ directory.
This shows the dependency of the installed packages in the image.
This shows the Build duration of each package in the image by the order of Build
Flashing the SD Card
In the GUI of balenEtcher, select our image from /buildroot/output/images/sdcard.img.Select the Flash Drive and Flash the image.
After flashing the SD Card, you can see that the SD Card has been partitioned into three areas.
- bootfs Partition in FAT format (34 MB)
- rootfs Partition in Ext4 format (126 MB)
- Rest is Free Space (< 32 GB)
Booting the Raspberry Pi
I checked my Wireless Router's LAN Client list and found the IP address of my Raspberry Pi connected to the Router via an Ethernet Cable. Then, I launched PuTTY in SSH and typed in the IP Address, it prompted me to enter the Username and Password to access the shell.
Inspecting the Default Image
We have to login as root and enter the password we set in the System Configuration menu. The busybox package in the image has the most common utilities in a single package.
You can see the Linux Kernel version, the uptime of the device. Also, I had changed the filesystem size to 1GB. You can also see the contents of the /bin and /sbin directories.
Adding additional packages in Buildroot and rebuilding the image.
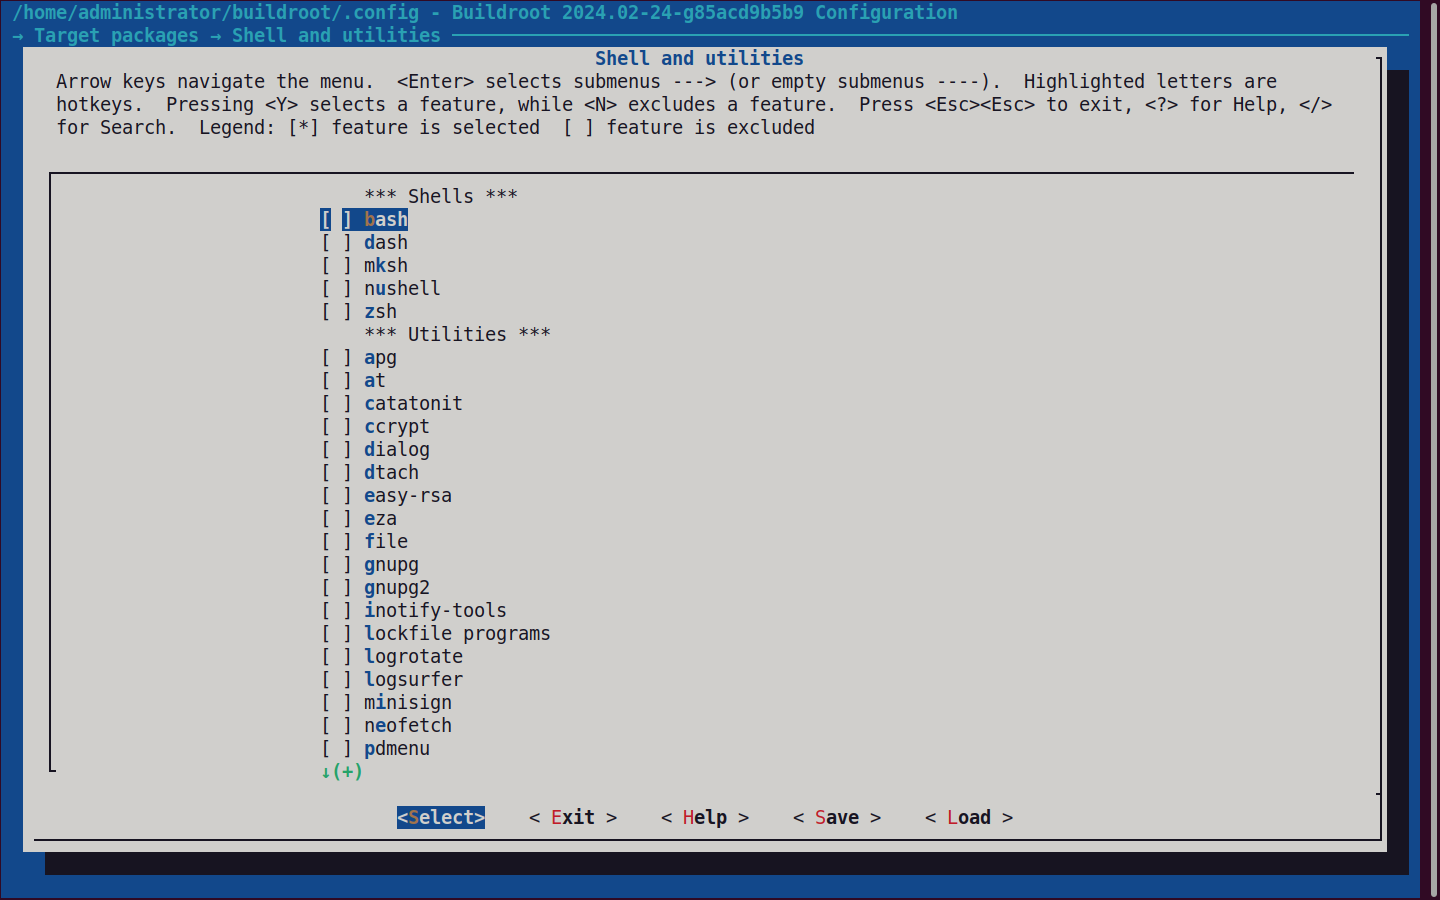
We are adding the following packages in the Buildroot.
- bash
- nmap
- nginx
Check out this screenshots to know where to locate these packages.
All these three packages comes under Target Packages > Networking Applications >
Now execute the make utility the same as before and flash the SD Card with the newly built image from /buildroot/output/images/sdcard.img using balenaEtcher. The newly built image will be bigger in size due to the additional packages. Same as before, access the Raspberry Pi using SSH from PuTTY. Check if the additional packages have been installed or not. You can see that the bash, nmap and nginx packages have been installed by looking at their versions.
Also, the nmap package is in the /usr/bin directory while the nginx package is in the /usr/sbin directory.
You can do much more with Buildroot than generating images. In the next blog, I will show you how to cross-compile binaries for the Raspberry Pi platform using the cross-compiler built by Buildroot.


.png)
.png)
.png)


.png)
.png)


